In a galaxy far far away...well, Enfield actually, two sisters came together to create a Star Wars taste sensation on one of the hottest days of 2010 so far.
This one is fairly straightforward as it doesn't involve any actual baking. So, step one is go to the shops and buy the following:
1 chocolate swiss roll
A pack of 6 mini rolls
1 pack of white, ready to roll icing
1 pack of coloured, ready to roll icing (which must have black and your choosen sabre colour)
For the Icing 'glue' that will hold your cake together:
2 egg whites
250g icing sugar
1 teaspoon Vanilla essence
1 tablespoon Glucose (In a squeezy tube from the baking section.)
Note: if you don't fancy the icing glue then warm jam will also work.
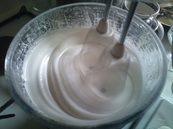
Firstly seperate your eggs, my best tip for doing this is cracking the egg gently tipping it into your hand and letting the white of the egg run through your fingers. Put the whites in a bowl with the icing sugar, glucose and vanilla essence. Put the bowl on top of saucepan of gently simmering water and whisk with an electric mixer for seven minutes. Then remove from the heat and continue to mix for a further two minutes - you now have the 'glue' for your cake. It should be thick and fluffy and stand in peaks when you pull the beaters out.
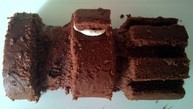
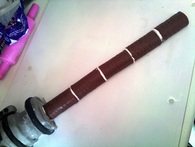
So, obviously a chocolate swiss roll does not look much like light sabre hilt, so you need to cut out chunks (keep the handle ones) from your large swiss roll to make it look like the hilt. See the picture above.
You will need something large enough to prepare and serve your cake on. We used a glass chopping board, but you could be fancy and get a proper cake board from a baking supplies shop. Place you carved hilt in one corner of the board, (make sure it is the right way round unlike Carly's first attempt!) then stick it down with little of you glue.
You will need something large enough to prepare and serve your cake on. We used a glass chopping board, but you could be fancy and get a proper cake board from a baking supplies shop. Place you carved hilt in one corner of the board, (make sure it is the right way round unlike Carly's first attempt!) then stick it down with little of you glue.
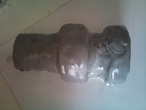
Get a big chunk of your white icing and combine with a little black to make grey for your hilt. Once mixed, roll out until about 5mm thick, but make sure you use some icing sugar on your counter to prevent sticking. Now the next bit is a little tricky, with a palette knife or a pastry brush cover your hilt in a thin layer of glue. Then gently lift your rolled out icing over your rolling pin and gently lay over your cake. Starting in the centre mould the icing very gently around the lumps and bumps and tuck in at the bottom. Then take your cut out handle lumps and cover with black icing, re-attach with a little icing glue and get creative with the black icing creating your light sabre handle. If you were feeling very fancy then you could get your hands on some edible gold or silver icing.
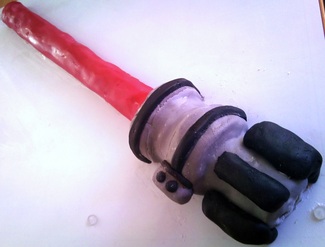
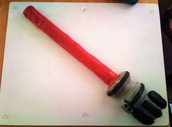
Then line up your mini rolls coming out of the hilt glue together as you go. You should now have a naked lightsabre ready for icing. Cover the mini rolls with a thin layer of your icing 'glue' and your ready ice. Take your chosen colour and roll out a long piece large enough to cover the whole 'blade' use the same technique as before. I would like to take this opportunity to point out that it was at this stage we realised that perhaps red was not the be colour as it looked a bit rude and prompted a few giggles when we served it up!
Now if like us you have some problems then don't worry you can always roll out more icing to cover up the odd boo boo. The day we made our cake was one of the hottest so far of 2010 and that doesn't really work well for royal icing so if it starts to get sticky or isn't working the way it should then just pop it in the fridge for a bit. Also use plenty of icing sugar when rolling out, you can always dust it off once the cake is iced.
That's it your cake is now complete, enjoy and may the force be with you and eat the left over icing glue until you feel a little bit sick!
That's it your cake is now complete, enjoy and may the force be with you and eat the left over icing glue until you feel a little bit sick!

 RSS Feed